

In a borough where square footage is a premium and style is a way of life, the traditional TV stand can feel like an antique. It hogs precious floor space, collects dust, and disrupts the clean lines of a modern Brooklyn apartment. You dream of a sleek, minimalist entertainment setup—a screen that appears to float on the wall, creating a home theater experience without the bulky furniture.
But the path to that perfect, floating TV is fraught with questions and potential pitfalls. What if you hit a lath and plaster wall in your Crown Heights brownstone? How do you ensure a heavy screen stays securely mounted in a building that might have seen decades of DIY repairs? Achieving that high-end look requires more than just buying a bracket; it demands careful planning and precise execution. This guide will walk you through the process of selecting and installing TV wall mounts, transforming your viewing experience while keeping your walls and your television safe.
The Brooklyn Mounting Challenge: More Than Just Finding a Stud
Installing a TV in a Brooklyn home isn't always straightforward. The unique architecture and building materials present specific hurdles that you need to navigate for a secure installation.
Understanding Your Wall Type: The Foundation of Security
The single most important factor in your installation is what’s behind your drywall. Hitting the right support is non-negotiable.
-
Modern Drywall over Studs: Many newer apartments have standard drywall on wood or metal studs. Finding the studs is your primary mission. A stud finder is your best friend here, but be aware that electrical wiring and plumbing can often run through these same studs.
-
The Classic Lath and Plaster: Found in countless pre-war brownstones in neighborhoods like Park Slope and Bedford-Stuyvesant, lath and plaster walls are incredibly sturdy but can be brittle. The wooden laths behind the plaster are narrower and more irregular than modern studs. Hitting them is crucial, but drilling can easily cause the plaster to crack or chip if you're not careful.
-
Concrete or Brick Walls: In many loft-style apartments or building exteriors, you might be dealing with concrete or brick. This requires a completely different set of tools—namely, a heavy-duty hammer drill and concrete anchors—but offers an incredibly strong mounting surface.
The Consequences of a Poor Installation
Getting it wrong isn't just an aesthetic issue; it's a safety and financial risk.
-
The Catastrophic Fall: A TV that isn't properly secured can tear out of the wall, resulting in a destroyed television, damaged flooring, and a significant repair bill for your wall. It also poses a serious safety hazard to children and pets.
-
The "Almost Right" Headache: Even if the TV doesn't fall, a poorly planned mount can lead to a tilted screen, a TV that can't be angled correctly, or a mess of visible cables snaking down the wall, completely undermining the sleek look you were going for.
The Solution: A Methodical Approach to a Flawless Installation
Rushing the job is the biggest mistake you can make. A successful installation is a step-by-step process that prioritizes planning and precision over speed.
Step 1: Choosing the Right TV Wall Mount
Not all mounts are created equal. Your choice will determine your TV's functionality and viewing comfort. For residents seeking TV wall mounts Brooklyn NY offers various options, but understanding the types is key.
-
Fixed Mounts: These hold the TV flush against the wall, offering the slimmest, most streamlined profile. This is ideal for a room where you always watch from directly in front of the screen and want a minimalist "picture frame" look.
-
Tilting Mounts: These allow you to tilt the TV vertically up or down a few degrees. This is perfect for mounts that are higher than eye level, like over a fireplace (used sparingly) or in a bedroom, helping to eliminate glare and provide a better viewing angle.
-
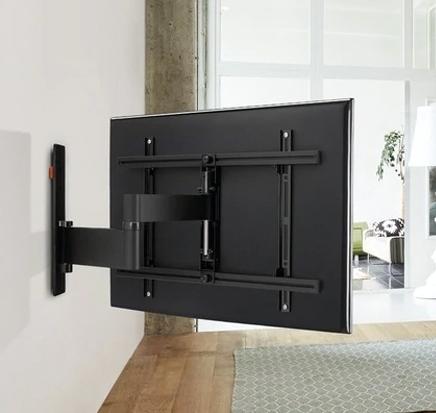
Full-Motion or Articulating Mounts: These are the most versatile. They extend away from the wall and swivel left, right, and tilt. This is the best choice for a room with multiple seating areas or if you need to pull the TV out to access ports on the back. Be mindful that they require more clearance and project further from the wall.
Pro Tip: Always check your TV's VESA pattern (the standardized spacing of the mounting holes on the back) and weight, and ensure the mount you choose is rated to support it.
Step 2: Gathering Your Tools and Materials
Before you make a single hole, assemble your toolkit. You will need:
-
A stud finder (magnetic ones are great for finding drywall nails in studs, while electronic ones can detect live wires)
-
A quality drill and drill bits
-
A hammer (for tapping in anchors)
-
A level
-
A screwdriver, socket wrench, or impact driver
-
The mounting hardware provided with your mount
-
Painter's tape and a pencil
-
A helper! TVs are awkward and fragile; never try to lift and mount one alone.
Step 3: The Installation Process - Precision is Key
This is where your preparation pays off.
-
Find the Studs: Use your stud finder to locate the studs in your desired mounting area. Mark the edges of each stud with painter's tape. For lath and plaster, you may need to use a small pilot hole to confirm you've hit solid wood.
-
Hold and Level the Mounting Bracket: Have your helper hold the wall plate of the mount against the wall, centered on the studs. Use your level to ensure it is perfectly straight. This is a critical step—a crooked mount means a crooked TV.
-
Mark and Pre-Drill the Holes: Once it's level, use a pencil to mark the drilling points through the holes in the bracket. Remove the bracket and pre-drill pilot holes into the studs. This makes driving the lag bolts easier and prevents the wood from splitting.
-
Secure the Bracket to the Wall: Align the bracket with your pilot holes and use the provided lag bolts to securely fasten it to the wall. Tighten them firmly, but avoid over-tightening, which can strip the wood or damage the bracket.
-
Attach the Arms to the TV: Secure the mounting arms to the back of your TV using the appropriate screws from the kit. Be sure they are snug, and double-check that you are using the correct screw length to avoid damaging your TV's internal components.
-
The Final Lift: With your helper, carefully lift the TV and hook the mounting arms onto the wall bracket. Listen for a definitive click or engage any locking mechanisms as per the instructions. Gently test that the TV is secure.
Step 4: The Final Touch - Cable Management
A sleek look is ruined by a tangled mess of cables. Run power cords, HDMI cables, and other wires through a single, paintable cable management raceway that you can attach to the wall. This creates a single, clean vertical line that makes the entire installation look professional.
The Rewards: A Transformed Living Space
When done correctly, a wall-mounted TV offers benefits that go far beyond simply saving floor space.
-
A Sleek, Modern Aesthetic: Your room instantly looks larger, cleaner, and more intentional. The TV becomes a focused element of your decor rather than a bulky appliance.
-
Enhanced Safety and Space: By removing a precarious TV stand, you eliminate a tipping hazard for children and pets. You also free up valuable floor space for other furniture, plants, or simply to create a more open, breathable environment.
-
The Optimal Viewing Experience: With the ability to position your TV at the perfect height and angle, you reduce neck strain and glare, making movie nights and binge-watching sessions more comfortable and immersive.
-
Peace of Mind: Knowing that your expensive television is securely anchored to the wall, installed with care and precision, provides an invaluable sense of security. You can enjoy your entertainment without a lurking worry.
Your Brooklyn Home, Elevated
Mounting your TV on the wall is one of the most impactful, space-saving upgrades you can make to your Brooklyn home. It transforms your relationship with your technology and your living space. By respecting the unique character of your walls, choosing the right hardware, and following a meticulous process, you can achieve a professional-looking result that is both stunningly sleek and fundamentally secure. It’s the final, masterful touch that turns a room into a modern, functional, and beautifully designed sanctuary.