Introduction
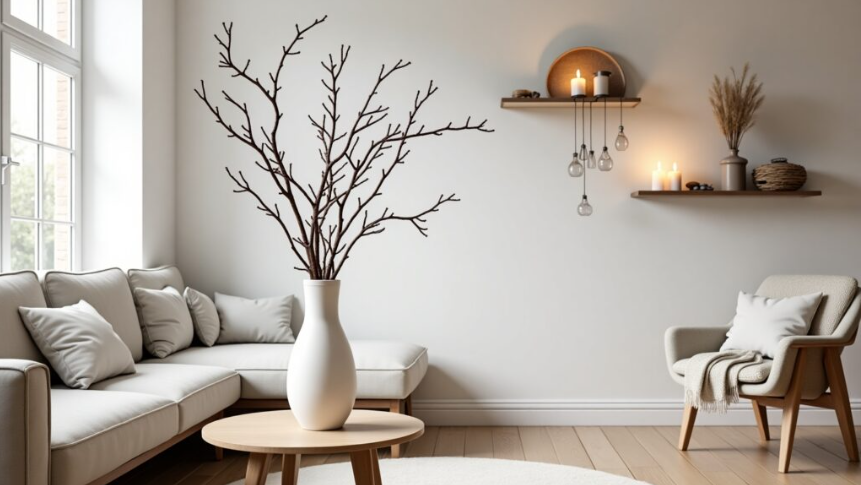
Decorating with natural elements has become a timeless trend. Among the most charming crafts is Pyntekvister, a Scandinavian-inspired way of styling branches for decoration. These displays are simple, elegant, and perfect for adding beauty to any space.
If you’ve ever wondered how to create a Pyntekvister display at home, this step-by-step guide will walk you through the process. You’ll learn how to collect, prepare, and arrange branches to design unique decorations that fit any season.
What is Pyntekvister?
The word Pyntekvister translates roughly to “decorative branches.” It’s an art form that involves collecting natural branches and turning them into creative displays. These arrangements can be simple—like bare twigs in a vase—or detailed with ribbons, lights, and ornaments.
Pyntekvister is popular because it blends nature with design. It is eco-friendly, budget-friendly, and customizable. Whether you want a rustic look for your living room or a festive centerpiece, Pyntekvister is the perfect craft.
Why Choose Pyntekvister for Home Décor?
There are many reasons why people love making Pyntekvister displays:
-
Eco-Friendly: Uses natural materials.
-
Budget-Friendly: Branches cost nothing to collect.
-
Creative Expression: You can style them any way you like.
-
Seasonal Flexibility: Works for Christmas, Easter, or everyday décor.
-
Minimalistic Charm: Fits Scandinavian, modern, and rustic homes.
In short, Pyntekvister is both simple and stylish.
Materials You Will Need
Before starting, gather these materials:
-
Fresh or dried branches
-
Pruning shears
-
A vase, jar, or pot
-
String, twine, or ribbon
-
Optional decorations (lights, ornaments, flowers, or paper cutouts)
Most of these items are inexpensive or already available at home.
Step 1: Collecting the Branches
The first step in making Pyntekvister is collecting branches. Here’s how:
-
Walk through your garden, park, or woodland area.
-
Choose branches that are sturdy but not too thick.
-
Look for unique shapes—curved, forked, or spiraled branches add character.
-
Avoid rotten or fragile pieces.
Tip: Willow, birch, and cherry branches are popular choices because they are flexible and elegant.
Step 2: Preparing the Branches
Once collected, branches need to be prepared:
-
Trim Excess Leaves: Use pruning shears to remove leaves or small twigs.
-
Clean Them: Wipe branches with a damp cloth to remove dirt.
-
Dry Them: If branches are freshly cut, let them dry for a few days to prevent mold.
If you want a polished look, spray paint branches in white, gold, or silver. For a natural feel, leave them as they are.
Step 3: Choosing a Base
The base holds your Pyntekvister display together. Common choices include:
-
Glass Vases: Perfect for modern homes.
-
Rustic Jars or Pots: Great for farmhouse style.
-
Metal Buckets: Adds an industrial touch.
Make sure the container is heavy enough to support the branches. Add stones, pebbles, or sand at the bottom for stability.
Step 4: Arranging the Branches
Now comes the creative part: arranging your Pyntekvister.
-
Start with taller branches in the center.
-
Add medium branches around them.
-
Place shorter ones near the edges.
-
Adjust until the arrangement looks balanced.
Remember, asymmetry often looks more natural than a perfectly even design.
Step 5: Decorating the Branches
This step depends on your theme. Here are ideas:
-
Minimalistic Style: Leave branches bare or add a simple ribbon.
-
Festive Style: Hang ornaments, Easter eggs, or Christmas stars.
-
Romantic Style: Add fairy lights or small flowers.
-
Scandinavian Style: Use neutral tones, white ornaments, and wooden decorations.
Pyntekvister works well because you can change decorations for each season without replacing the branches.
Step 6: Final Touches
Once decorated, place your Pyntekvister in a visible spot. Ideal locations include:
-
Living room corner
-
Dining table centerpiece
-
Entryway decoration
-
Bedroom side table
Add a small candle or lantern near it to make the display more eye-catching.
Seasonal Ideas for Pyntekvister
Spring
-
Add pastel-colored ribbons.
-
Hang paper butterflies or flowers.
-
Use fresh green twigs.
Summer
-
Decorate with seashells, mini lanterns, or sun-shaped cutouts.
-
Bright colors like yellow and blue work best.
Autumn
-
Attach artificial leaves in orange and red.
-
Add pinecones and mini pumpkins.
Winter
-
Hang Christmas ornaments, stars, and snowflakes.
-
Use fairy lights for a warm glow.
Tips for Long-Lasting Displays
-
Use dried branches for longer life.
-
Store decorated branches carefully for reuse.
-
Keep displays away from direct sunlight and moisture.
-
Refresh decorations with seasonal updates.
Quick Reference Table for Pyntekvister Displays
| Step | Action | Example |
|---|---|---|
| Collecting | Choose branches | Willow, birch, cherry |
| Preparing | Clean & trim | Remove leaves, dry branches |
| Base | Select container | Vase, jar, pot |
| Arranging | Balance sizes | Tall center, small edges |
| Decorating | Add ornaments | Ribbons, lights, flowers |
| Placement | Choose spot | Living room, dining table |
Why Pyntekvister Fits Modern Homes
Modern décor often values minimalism and sustainability. Pyntekvister checks both boxes. It uses natural resources and avoids plastic-heavy decorations. At the same time, it allows endless creativity. No two displays look the same.
This makes Pyntekvister more than just a decoration. It’s a personal expression of style, culture, and connection to nature.
FAQs About Pyntekvister
Q1: Do I need special skills to make Pyntekvister?
No, even beginners can make simple and beautiful displays.
Q2: Can I use artificial branches?
Yes, but natural ones give a more authentic look.
Q3: How long do Pyntekvister displays last?
Dried branches can last for years with proper care.
Q4: Can Pyntekvister be used outdoors?
Yes, but protect them from rain to avoid damage.
Q5: What’s the best season to collect branches?
Autumn and winter are ideal because branches are bare.
Read more on our homepage.


